
Recently, I got fed up with the number of ads I was seeing on my smartphone. So I set up a Pi-hole.
Background Information
Pi-hole is an open-source, network-based content blocker that is commonly used to filter advertisements, trackers, malware, and more. Because it operates at the network level, it is highly effective at blocking advertisements on devices ranging from computers to smart TVs and appliances, regardless of hardware, software, or operating system.
In order to fully understand how Pi-hole works, we will take a look at how part of the internet works, specifically the domain name system (DNS). For this part of the post, I’ll be borrowing some slides I made for a technical presentation I gave last year to members of my fraternity about this topic.
What is DNS?
Every device on the internet is assigned a unique identifier called an IP address. I won’t dive too deep into IP addresses and how they are assigned, as that is outside the scope of this post, but you can think of it similar to someone’s street address.
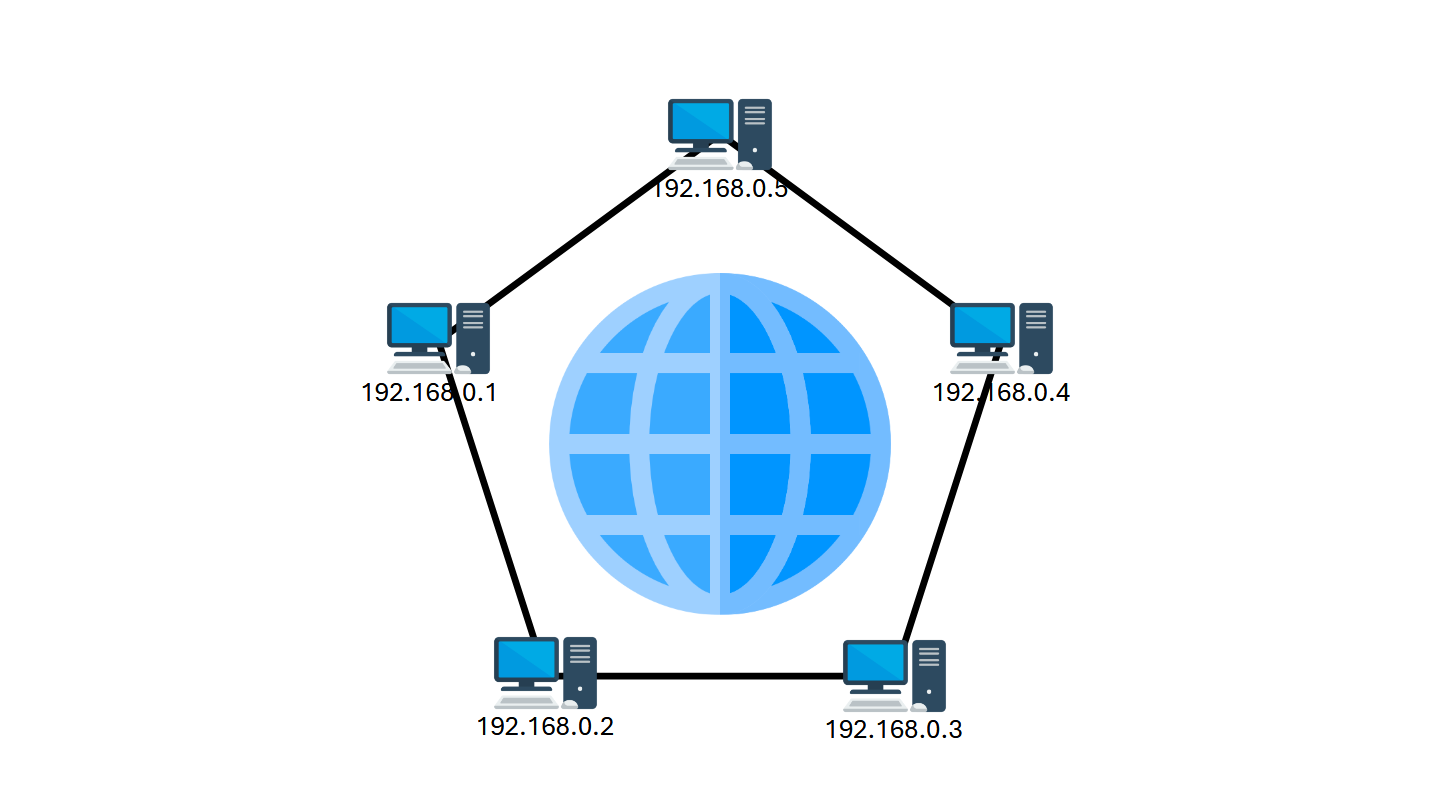
Instead of saying, “123 Main Street,” I would say “The Coffee Shop.” Applications, such as web browsers, work in a similar way. Likely, when you accessed my website, you were given the domain name, richardlamb.dev.
Your browser needs a way to convert this domain name into an IP address. This is where the Domain Name System, or DNS, comes into play.
How Does DNS Work?
When you connect to a Local Area Network (LAN), such as Wi-Fi, or a Virtual Private Network (VPN), such as Tailscale, the router automatically gives you the IP address of a DNS server to use. Usually, the IP address is for a public DNS resolver available to anyone on the internet, but it can sometimes be a private resolver available only to people using that particular LAN or VPN.
When your computer comes across a domain name that it doesn’t know the IP address of, it asks the DNS server where it can find that domain. The DNS server then responds with the IP address of that domain.

So What Exactly Does Pi-hole Do?
“What if we could lie whenever a device asks for the IP address of a domain that primarily serves advertisements? What if we could replace that DNS server the router told us to use with the one that lies?” That is exactly what Pi-hole does, and that is exactly what we will do in this tutorial. Since DNS is largely unencrypted, Pi-hole acts as a middleman and sits in between your devices and a public DNS resolver. Whenever a device asks Pi-hole for the IP address of a domain known to host advertisements, instead of forwarding the IP address of that domain from the public resolver, Pi-hole will simply tell that device the domain doesn’t exist.

Tutorial
The official Pi-hole documentation is great for setting up access to Pi-hole in a single home or office setting. However, as a college student, I have a few requirements for my Pi-hole that the official guides do not cover:
- Flexible, so I can access Pi-hole from any network including my apartment’s Wi-Fi, the university network, and cellular data
- Private, so only I can access the Pi-hole, its admin console, and my DNS data
- Fast, so my devices still feel snappy
- Secure, so DNS requests can’t be easily manipulated by hackers
In this tutorial, we will first install a Linux distribution on a Raspberry Pi or other hardware of your choice to be used as our server. We then will set up a Tailscale network (sometimes referred to as a Tailnet) and connect our server to it. We then will install Pi-hole on our server, configure our Tailnet to use Pi-hole as its DNS server, and connect our devices to our Tailnet. Lastly, we will configure automatic updates on our server for security.
Tip: If you have an old PC or laptop that can’t run Windows 11, running Pi-hole is an excellent way to repurpose it!
Meet: Tailscale
Tailscale is an online cloud service similar to a virtual private network (VPN) allowing you to connect devices across the internet (a public network) to the same private network. When devices are connected to your Tailnet, they will use its DNS (the Pi-hole) instead of the DNS provided by your Wi-Fi connection.
What You Will Need
- Either of the following:
- A Raspberry Pi (Model 2 or newer recommended)
- An old PC you don’t mind wiping the hard drive and installing Linux on
- If using a Raspberry Pi:
- An SD card (32+ GB recommended) you don’t mind wiping
- A power supply appropriate for the model you’re using
- If using a PC:
- A USB stick you don’t mind wiping
- A strong internet connection
- About 45 minutes of time
Install an OS
I am not going to go into depth about how to install an OS on a machine or a Raspberry Pi, as that would take too much time and be outside the scope of this tutorial. However, I will point you to the following resources to help you do so:
- If you’re using a Raspberry Pi, use Raspberry Pi OS. You can install it easily using the official Raspberry Pi Imager.
- If you’re using a standard x86_64 PC, use Debian, Ubuntu, or a derivative. Ubuntu is probably the easiest for new users. Installation Instructions
Tip: Skip ahead and set up a Tailscale account while you wait for the long and boring part of the OS install.
Setup Tailscale
Go to Tailscale.com and create an account. Everything in this tutorial is possible on a free account. You do not need a paid account.
Install Tailscale Client
The official instructions for installing Tailscale tell you to pipe to a shell:
curl -fsSL https://tailscale.com/install.sh | sh
For security reasons, I’m not a fan of directly piping to a shell, but I’ll stick to it for the purposes of this tutorial. If you want to manually inspect the contents of the script before running it, you should instead run the following series of commands:
curl -fsSL https://tailscale.com/install.sh > install.sh && cat install.sh
chmod +x install.sh && sh install.sh
If you get an error saying that the curl command is not found, you may need to install it:
sudo apt update && sudo apt install curl -y
For now, we will tell the Raspberry Pi/PC to ignore Tailscale’s DNS (as we haven’t set up Pi-hole yet) and use the DNS provided by the router. Execute the following command to authenticate with Tailscale:
sudo tailscale up --accept-dns=false
Copy and paste the URL printed by this command into a browser and sign in.
Configure Tailnet
Open the Tailscale Admin Console, navigate to Machines, click on your Raspberry Pi/PC, and click on Machine Settings in the upper-right. Select Disable key expiry. This will keep the machine connected to your Tailnet without having to re-authenticate it.
Navigate back to the Machines page and take note of the IP address of the Raspberry Pi/PC. The IP address is the 100.X.X.X number.
Still on the Machines page, click on the down arrow next to the IP address of the Raspberry Pi/PC. Take note of the fully-qualified domain name (FQDN). The FQDN is in the format <hostname>.tailXXXXX.ts.net. You will want to bookmark this domain because it will be used to access the Pi-hole admin console later on.

Navigate to the DNS page, scroll down to Nameservers, select Add nameserver, then select Custom…. Enter the IP address you noted earlier and save. Turn on Override DNS servers.
Scroll all the way to the bottom of the DNS page, and select Enable HTTPS…. Acknowledge the prompts that appear. This will allow us to use an HTTPS connection to the Pi-hole console later.
Configure Firewall
I don’t want random people in my apartment building (or on the internet) to be able to use my Pi-hole’s DNS or access my Pi-hole’s admin console. This is where the firewall comes into play. The firewall controls access to Pi-hole’s DNS and admin console. Below, I will show you how to lock down access to the Pi-hole to only devices connected to Tailscale. We will use UFW, a popular frontend for IPTables.
You can skip this step if you intend to use the same Pi-hole within the local area network (LAN) that you are deploying it in. For example, you can skip this step if you are deploying it in your home. Only skip this step if you know for sure that your network properly firewalls the Pi-hole.
Warning: SSH-ing into your Raspberry Pi/PC is not recommended during this step of the process since the firewall can disrupt the SSH connection. It’s best to open a terminal directly on the device itself.
Bring up a terminal on the Raspberry Pi/PC. Execute the following command to install UFW:
sudo apt update && sudo apt install ufw -y
If you’re connected to your Raspberry Pi/PC over secure shell (SSH), you’ll need to add a rule before enabling the firewall. This is to ensure that your SSH session does not disconnect once the firewall is enabled.
The following command will allow SSH access on your Tailnet:
sudo ufw allow in on tailscale0 to any port ssh
If your Raspberry Pi/PC is on a trusted local area network (LAN), such as your home Wi-Fi, running the following commands will allow you to use SSH to access your Raspberry Pi/PC on your home network:
Caution: Only add these rules if your Raspberry Pi/PC hardware is connected to a network you know and trust, such as your home Wi-Fi. I did not add these rules on mine since my Raspberry Pi is connected to a Wi-Fi network that everyone in my apartment complex can access.
sudo ufw allow from 10.0.0.0/8 to any port ssh &&
sudo ufw allow from 172.16.0.0/12 to any port ssh &&
sudo ufw allow from 192.168.0.0/16 to any port ssh
Base Rules
The following series of commands will allow access to Pi-hole DNS and the Pi-hole admin console from any device connected to your Tailscale network:
sudo ufw allow in on tailscale0 to any port 53 &&
sudo ufw allow in on tailscale0 to any port 80 &&
sudo ufw allow in on tailscale0 to any port 443
Check and Enable
To check that you configured the rules properly, you can run:
sudo ufw status verbose
Assuming this is your first time configuring the firewall and you just ran the commands above, the output should be similar to below:
Status: active
Logging: on (low)
Default: deny (incoming), allow (outgoing), deny (routed)
New profiles: skip

To                         Action      From
--                         ------      ----
22/tcp on tailscale0       ALLOW IN    Anywhere
53 on tailscale0           ALLOW IN    Anywhere
80 on tailscale0           ALLOW IN    Anywhere
443 on tailscale0          ALLOW IN    Anywhere
22/tcp (v6) on tailscale0  ALLOW IN    Anywhere (v6)
53 (v6) on tailscale0      ALLOW IN    Anywhere (v6)
80 (v6) on tailscale0      ALLOW IN    Anywhere (v6)
443 (v6) on tailscale0     ALLOW IN    Anywhere (v6)
Lastly, enable the firewall by running:
sudo ufw enable
Allowing LAN Access
If you intend to use your Pi-hole on a local area network (LAN), such as your home Wi-Fi, in addition to Tailscale, you will need a few additional firewall rules. These rules allow access to your Pi-hole on all private IP address ranges commonly used for LANs.
Caution: Only add the rules in this section if your Raspberry Pi/PC hardware is connected to a network you know and trust, such as your home Wi-Fi. I did not add these rules on mine since my Raspberry Pi is connected to a Wi-Fi network that everyone in my apartment complex can access.
To enable access to Pi-hole DNS on your LAN:
sudo ufw allow from 10.0.0.0/8 to any port 53 &&
sudo ufw allow from 172.16.0.0/12 to any port 53 &&
sudo ufw allow from 192.168.0.0/16 to any port 53
To enable access to the Pi-hole admin console on your LAN:
sudo ufw allow from 10.0.0.0/8 to any port 80 &&
sudo ufw allow from 172.16.0.0/12 to any port 80 &&
sudo ufw allow from 192.168.0.0/16 to any port 80 &&
sudo ufw allow from 10.0.0.0/8 to any port 443 &&
sudo ufw allow from 172.16.0.0/12 to any port 443 &&
sudo ufw allow from 192.168.0.0/16 to any port 443
Setup Pi-hole
The official instructions for installing Pi-hole tell you to pipe to a shell:
curl -sSL https://install.pi-hole.net | bash
Again, I’m not a fan of directly piping to a shell. If you want to manually inspect the contents of the script before running it, you should instead run the following series of commands:
curl -sSL https://install.pi-hole.net > install.sh && cat install.sh
chmod +x install.sh && sudo bash install.sh
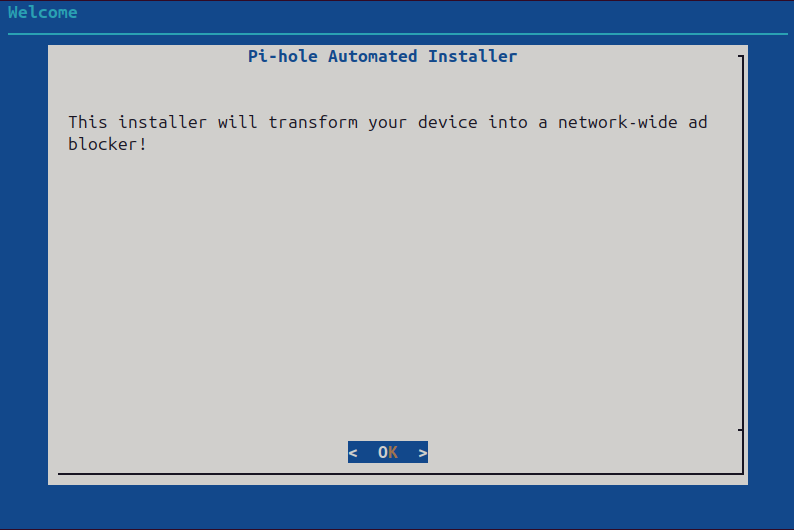
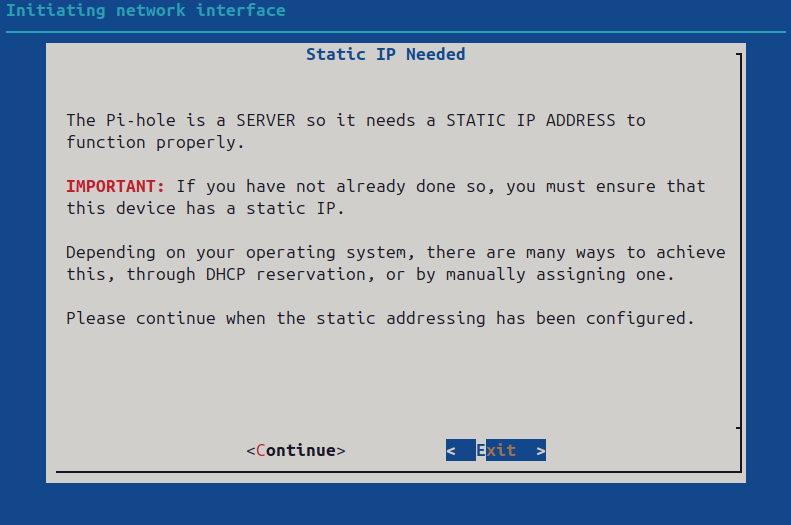
Step through the Pi-hole installation wizard. Use the arrow keys to move the cursor and the enter key to select.
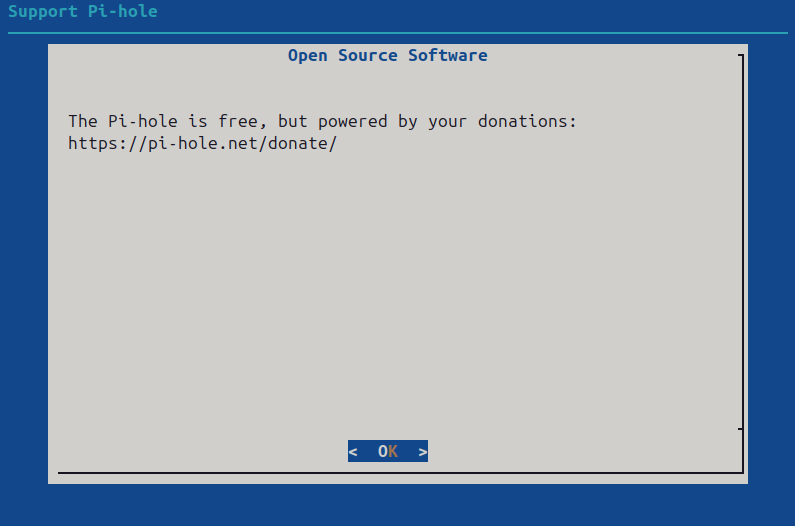
Enter through the first two slides.
Tailscale automatically assigns each device a static IP, so no need to worry. Use the left arrow to highlight <Continue> and press enter:
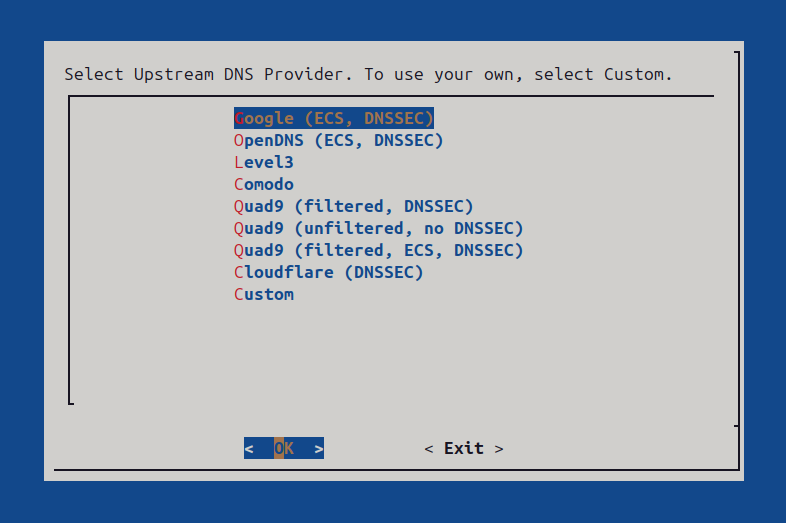
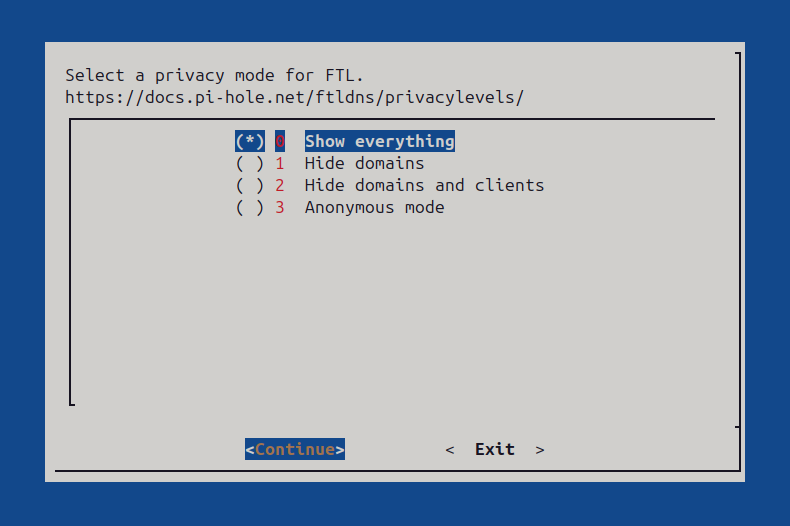
Your choice:
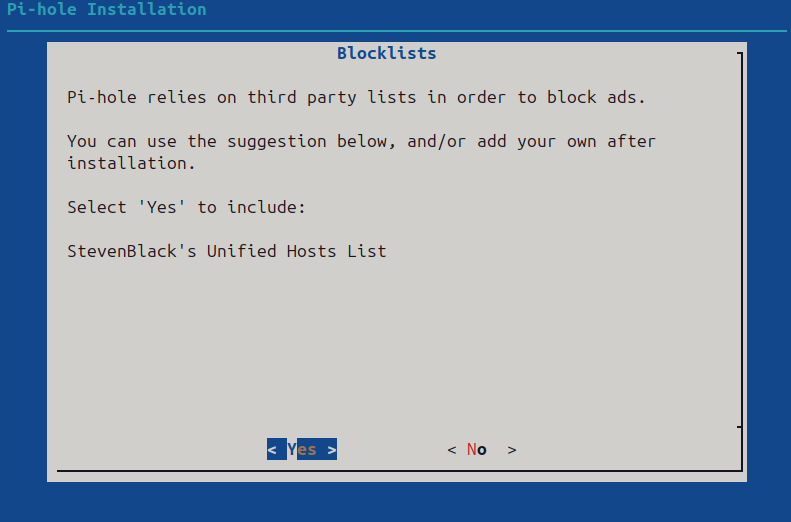
Your choice:
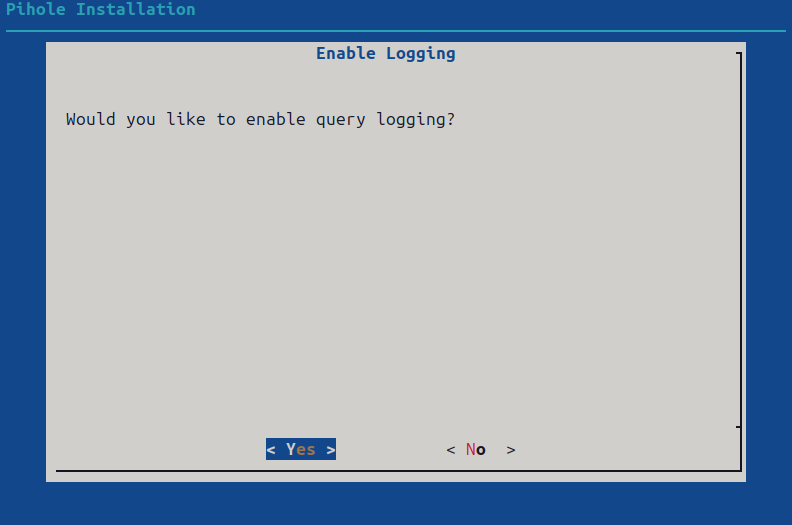
Your choice. I recommend yes if you’re using it just for yourself and no if you will be sharing it with others:
Your choice:
The installation is now complete! Take note of the password as you will need it to log in later.

The password is also displayed after you select <OK> as well:
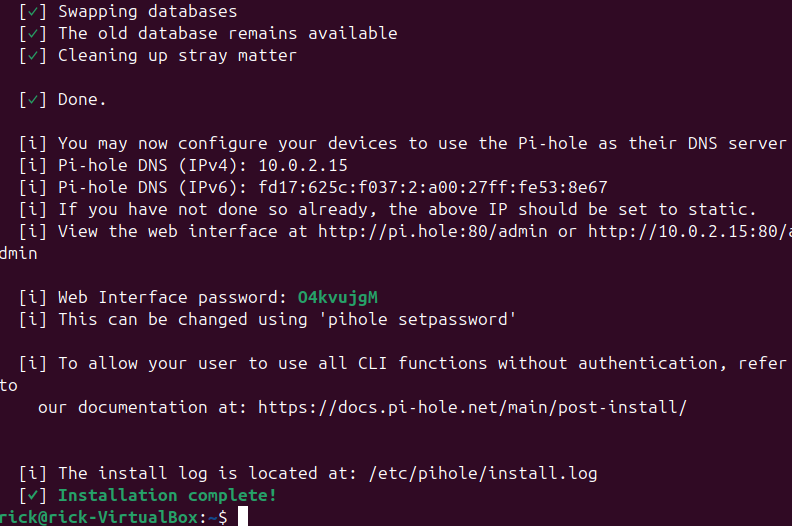
Take note of the password printed in the terminal at the end of the setup wizard. You will need it later!
After you have completed the Pi-hole setup wizard, there are a few more things we must configure before we have a fully functional Pi-hole. We will configure these options using the command-line, as we will not yet be able to access the Pi-hole admin console.
Run the following command to open Pi-hole’s configuration file:
sudo nano /etc/pihole/pihole.toml
Use CTRL / and type in 93 to jump to that line. Look for the following line:
piholePTR = "PI.HOLE"
Change to:
piholePTR = "NONE"
Use CTRL / and type in 164 to jump to that line. Look for the following line:
interface = "enp0s3" ### CHANGED, default = ""
enp0s3could be something different.
Change to:
interface = "tailscale0"
Use CTRL / and type in 209 to jump to that line. Look for the following line:
listeningMode = "LOCAL"
Change to:
listeningMode = "SINGLE"
Use CTRL / and type in 831 to jump to that line. Look for the following line:
domain = "pi.hole"
Change the value in quotes to your Pi-hole’s FQDN that you noted earlier.
It should look something like this:
domain = "raspberrypi.tailXXXXX.ts.net"
Do not include protocols like
http://orhttps://at the beginning of this value.
Use the keyboard commands CTRL S and CTRL X to save the file and exit the editor.
Run the following command to restart Pi-hole and apply the new configuration:
sudo service pihole-FTL restart
Finally, run the following commands to enable access to the Pi-hole admin console on your Tailnet:
sudo tailscale cert &&
sudo tailscale serve --bg 80
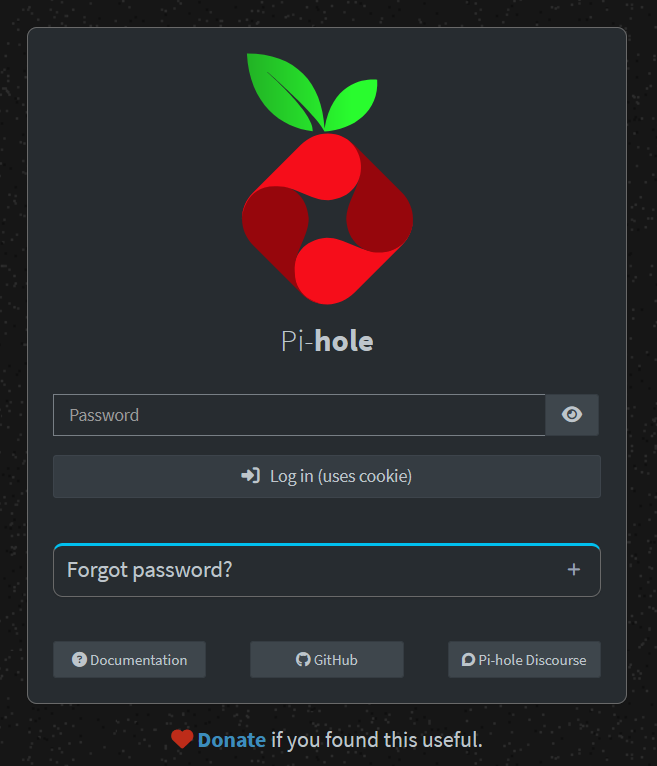
You should now be able to access the Pi-hole admin console using its FQDN. Install Tailscale and connect to your Tailnet on a computer with a web browser and point it to your Pi-hole’s FQDN. Log into Pi-hole using the password you noted earlier.
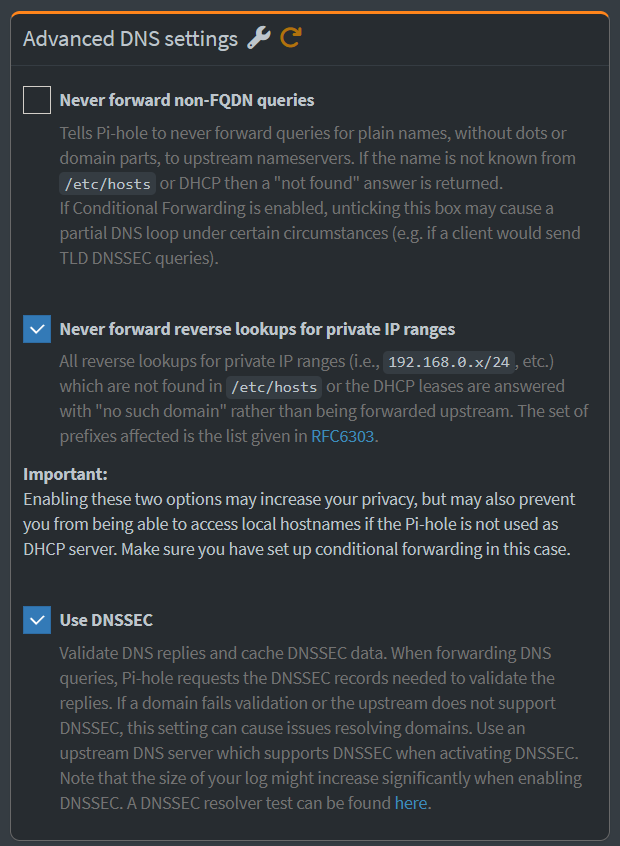
There are still a few more things we need to configure via the web interface. On the left-hand side of the Pi-hole admin console, select Settings > DNS. In the upper right-hand corner, flip the toggle switch from Basic to Expert.
On the far right-hand side, scroll to Advanced DNS settings. Uncheck the first box for Never forward non-FQDN queries. Check the other two boxes for Never forward reverse lookups for private IP ranges and DNSSEC.
Scroll all the way down to the bottom. Under Conditional forwarding, paste the following:
true,100.0.0.0/8,100.100.100.100
Finally, hit Save & Apply in the lower right-hand corner.
Set up Automatic Updates
System Packages
To automatically update our system, we will use a utility called Unattended Upgrades. Unattended Upgrades is a program for Debian-based Linux distributions (like Raspberry Pi OS and Ubuntu) that automatically updates system packages.
Note: Unattended Upgrades cannot automatically update Pi-hole since it’s not a system package. We will learn how to automatically update Pi-hole in the next section. Unattended Upgrades will automatically update Tailscale, since it’s a system package.
To install Unattended Upgrades, run:
sudo apt install unattended-upgrades
By default, Unattended Upgrades automatically downloads and installs security-related updates only. We will expand its configuration to download and install all system package updates automatically, perform automatic reboots overnight when we’re asleep, automatically fix common package manager issues, and automatically remove unnecessary old versions of system packages.
To configure Unattended Upgrades, run:
sudo nano /etc/apt/apt.conf.d/50unattended-upgrades
This will open the primary configuration file for Unattended Upgrades.
Use CTRL / and type in 45 to jump to that line. Right above the line with the characters };, paste:
// Install all updates automatically
"o=*,a=*";
Use CTRL / and type in 75 to jump to that line. Uncomment the following (remove the preceding //):
Unattended-Upgrade::AutoFixInterruptedDpkg "true";
Use CTRL / and type in 108 to jump to that line. Uncomment the following:
Unattended-Upgrade::Remove-Unused-Kernel-Packages "true";
Scroll down a bit to around line 111. Uncomment the following:
Unattended-Upgrade::Remove-New-Unused-Dependencies "true";
Scroll down a bit to around line 119. Uncomment the following:
Unattended-Upgrade::Automatic-Reboot "true";
Scroll down a bit to around line 123. Uncomment the following:
Unattended-Upgrade::Automatic-Reboot-WithUsers "true";
Lastly, Scroll down a bit to around line 128. Uncomment the following:
Unattended-Upgrade::Automatic-Reboot-Time "02:00";
This will automatically reboot the system nightly at 2:00 AM whenever it’s needed (ie. Linux Kernel update). You can optionally change the time if you’d like.
Finally, use the keyboard commands CTRL S and CTRL X to save the file and exit the editor.
Pi-hole
To automatically update Pi-hole, we will use a utility called Cron. Cron is a program included with many Linux distributions that allows for the easy automation of tasks.
To insert a new entry into the Cron table, run:
sudo crontab -e
If prompted for an editor, select the option for Nano (or optionally your favorite!) and press enter.
Use the arrow keys to scroll down to the end of the file and paste the following line:
30 3 * * * /usr/local/bin/pihole -up
This will check for and install any Pi-hole updates every day at 3:30 AM.
Use the keyboard commands CTRL S and CTRL X to save the file and exit the editor.
Block and Allow Lists
We again will use the Cron utility to automatically update the Pi-hole lists daily:
sudo crontab -e
At the end of the file, paste the following line:
0 6 * * * /usr/local/bin/pihole -g
This will update the block and allow lists every day at 6 AM.
Use the keyboard commands CTRL S and CTRL X to save the file and exit the editor.
Start Blocking Ads!
Install Tailscale on your mobile devices from the App Store or Google Play.
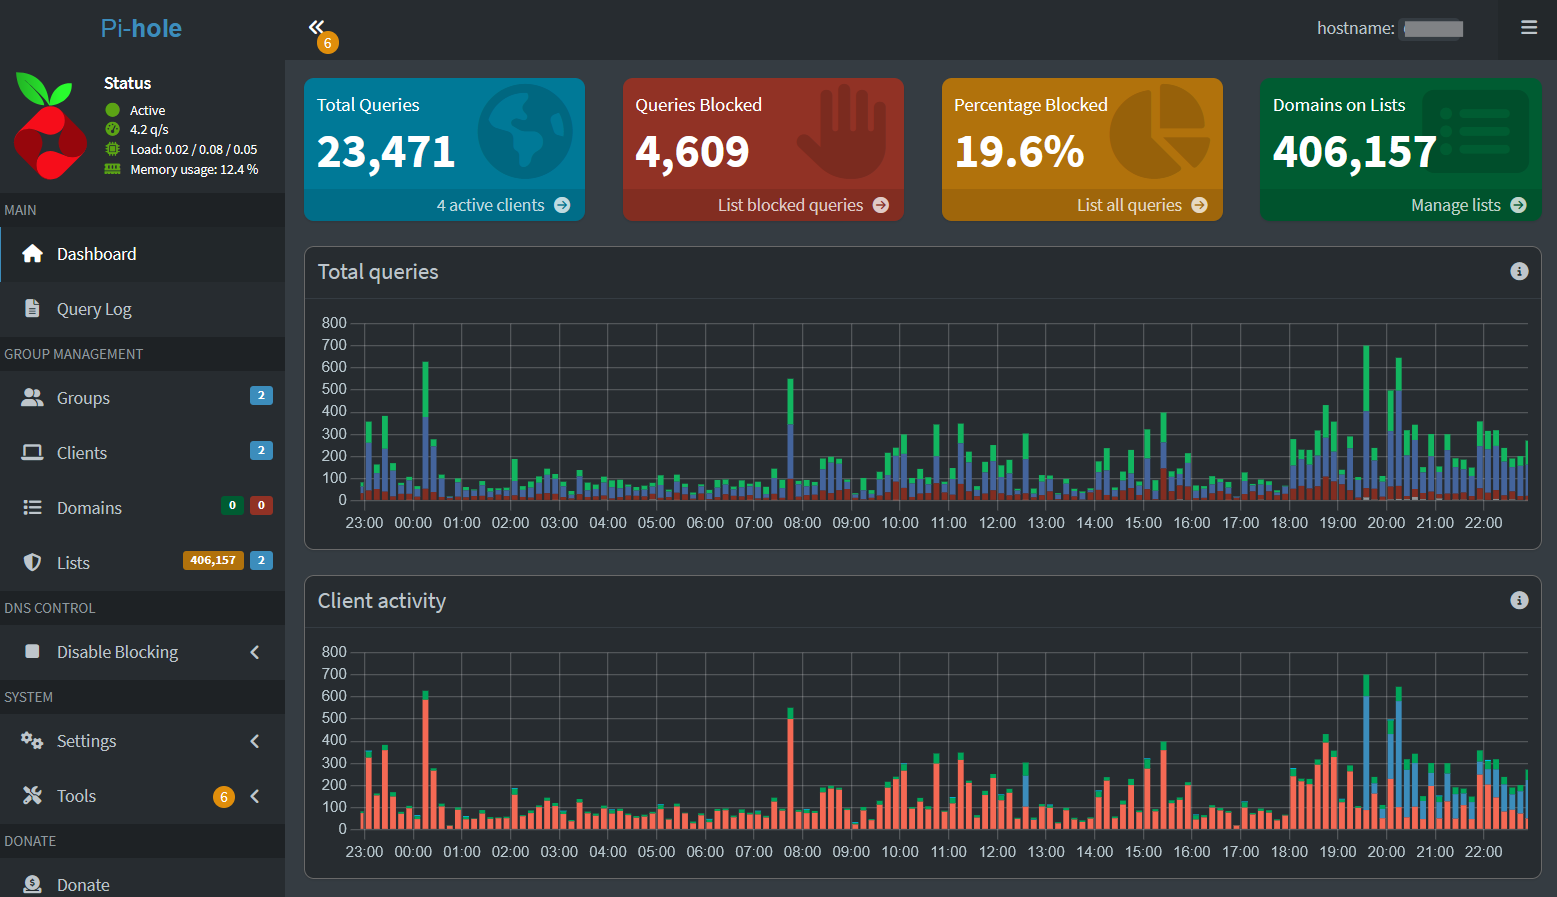
Sign in with your account and connect to your Tailnet. Log in to to your Pi-hole’s admin console to see how many ads you block and explore the statistics. It’s interesting to see your devices’ internet activity, especially when you aren’t using them!
This post is getting a little long, so I’ll end it here. I’m currently working on another post that will demonstrate how to set up an exit node on your Pi-hole as well as set up encrypted upstream DNS.
In the meantime, you can check out some of the resources below to learn more about Pi-hole or Tailscale. Feel free to drop a comment below as well if you’ve gotten this to work or run into any issues with the process!